Table of Contents
What Is Furniture Stripping and Refinishing?
If you've ever run your hand across a vintage credenza and or seen a finish gone yellow and cloudy, sticky, or alligatored, you've already met the problem that stripping and refinishing exists to solve. At Hobbs Modern every piece that comes through our hands is carefully evaluated to determine how to maintain its integrity and restore it to excellent vintage condition. We have compiled this guide of stripping, refinishing and restoring to shine a light on the slow and painstaking work of restoration. This usually unseen work gives iconic and one of a kind pieces a new life.
All the pieces we have in our inventory have been restored by Ryan and his team. Part of our philosophy is to reveal the wood grain and to use finishes that are more clear, allowing the wood to be the star. At Hobbs Modern, we restore as carefully as we sourced it.
Furniture stripping and refinishing is a two-part restoration process. It entails removing a piece's old, damaged, or deteriorated finish down to bare or near-bare wood (stripping), and then rebuilding a new protective and aesthetically beautiful finish in its place (refinishing). Done correctly, the two stages work together as a single discipline as you can't refinish well if the stripping was careless, and stripping alone leaves wood unprotected
In contrary to the cosmetic focus for newly produced furniture, the process of stripping and refinishing for authenticated mid-century modern pieces — an Eames lounge chair, a Wegner credenza, — is something closer to surgery. The wood underneath a 60- or 70-year-old finish is often irreplaceable: thin veneers, exotic species no longer harvested, and factory finishes that were part of the original design intent. Stripping and refinishing a piece like this isn't just "making it look new again." It's a controlled intervention meant to extend the piece's life without erasing its original value.
Stripping, refinishing, restoring: Understanding the Difference
These terms get used interchangeably in casual conversation, but at Hobbs Modern they describe three distinct levels of intervention. Choosing the right level for a given piece is one of the most consequential decisions in the entire process.
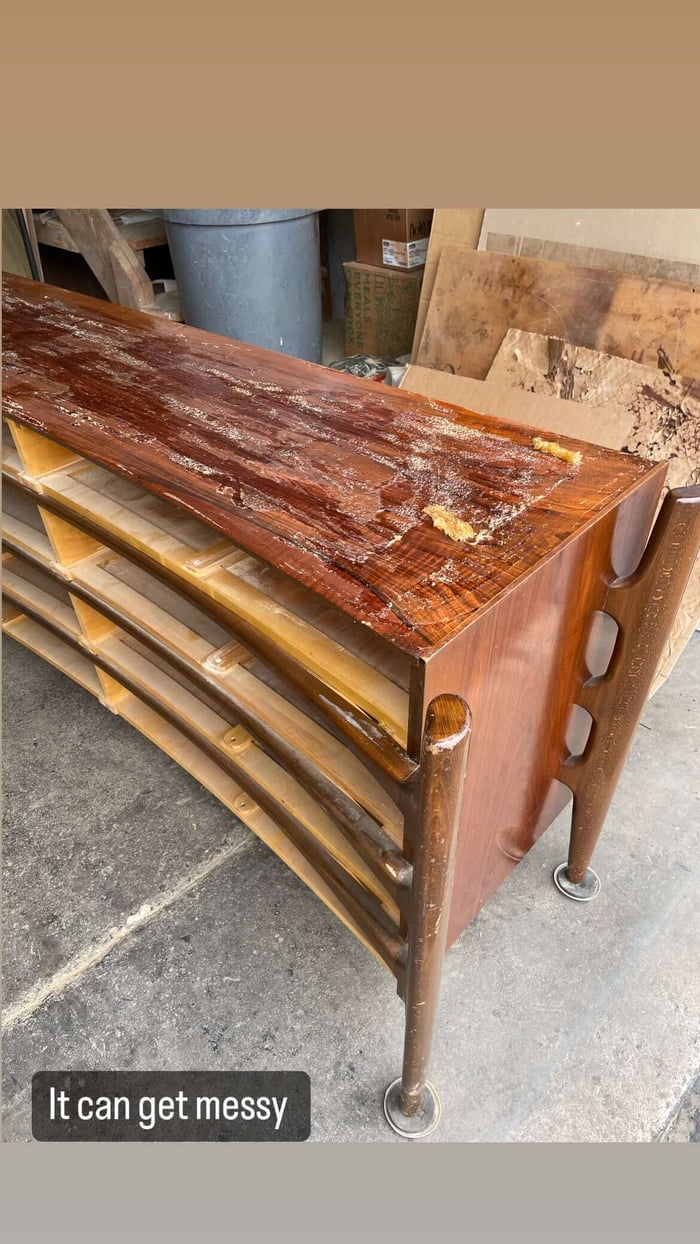
Stripping is the removal of an existing finish., This could be lacquer, varnish, shellac, or polyurethane, along with any wax buildup, grime, or failed prior refinishing attempts sitting on top of it. Stripping is typically chemical, though it can involve heat or hand-scraping for delicate areas. The goal of stripping is to get back to clean, bare wood (or as close to it as the piece allows), without removing wood itself. A finish can be 100% stripped and the piece will still look rough, pale, and unprotected. Stripping is a "trust the process" step, and will make the piece look much worse before it looks better.
For DIYers, we recommend using Kleen Strip: Paint Remover and Stripper or Jasco: Premium Paint Remover. Both can be found at your local Hardware store. After stripping we clean the stripped area with Lacquer Thinner or Acetone. We recommend using specialized protective gloves and to do it in a well ventilated area. Its important to note that once your start the stripping process you will have to refinish the wood afterward.
Steaming deep dents and scratches is the next step in the process. We use a conventional home iron and a white cotton cloth with water to steam deeps dents and scratches. When wood grain is exposed to water and steam, it expands, allowing the wood to fill in the negative space the dent created. After time and patience, the dent rises enough for us to sand the area smooth.
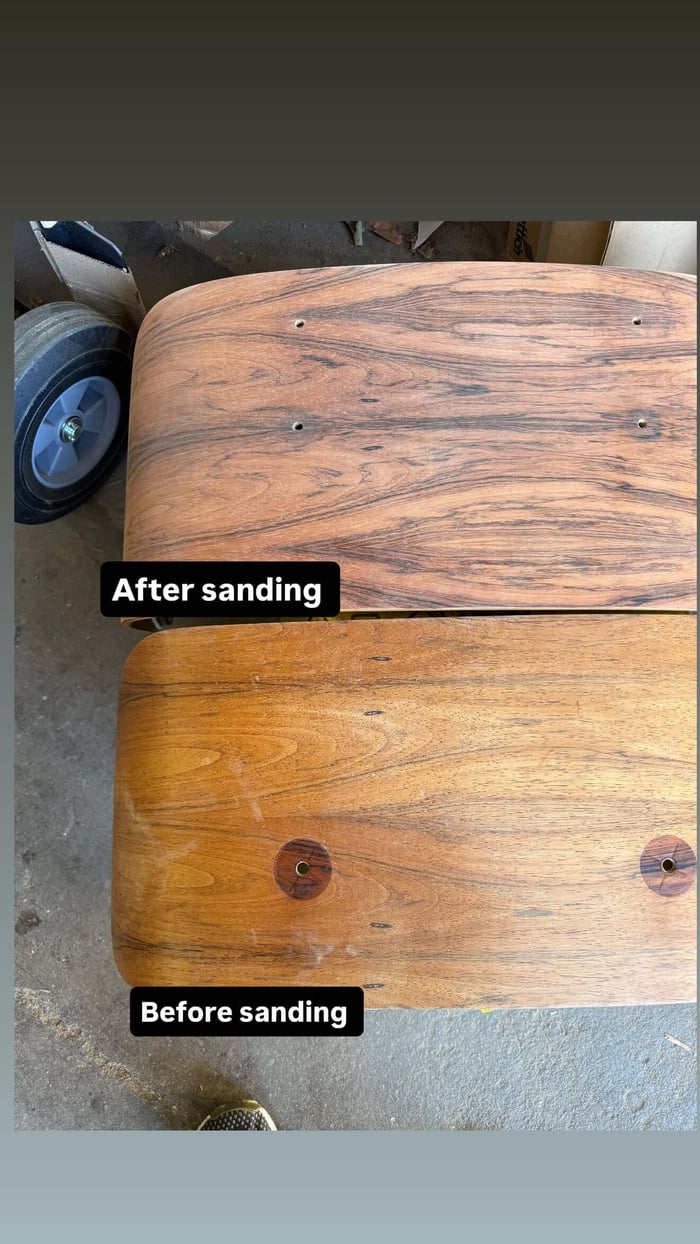
Refinishing is the complete process that follows a full strip. This process requires sanding bare wood to an even, consistent surface where the grain reads clearly again, applying an oil-based stain to enhance and even out color, and finishing with an appropriate topcoat once the wood has fully dried. Refinishing is the right call when the existing finish is too degraded — cracked, gummy, deeply discolored, or compromised down into the wood — to work with as a foundation.
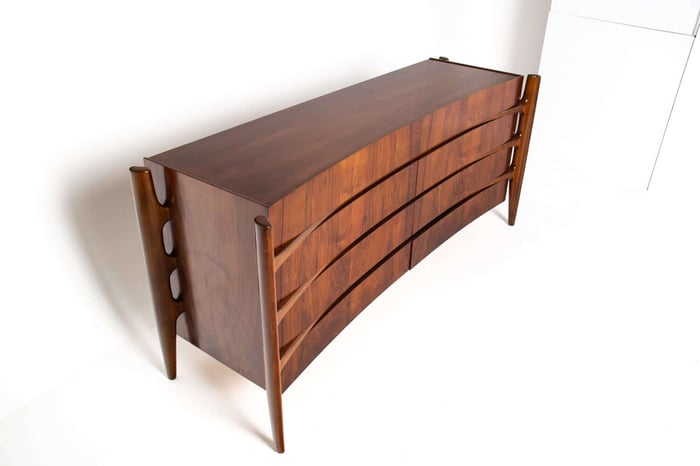
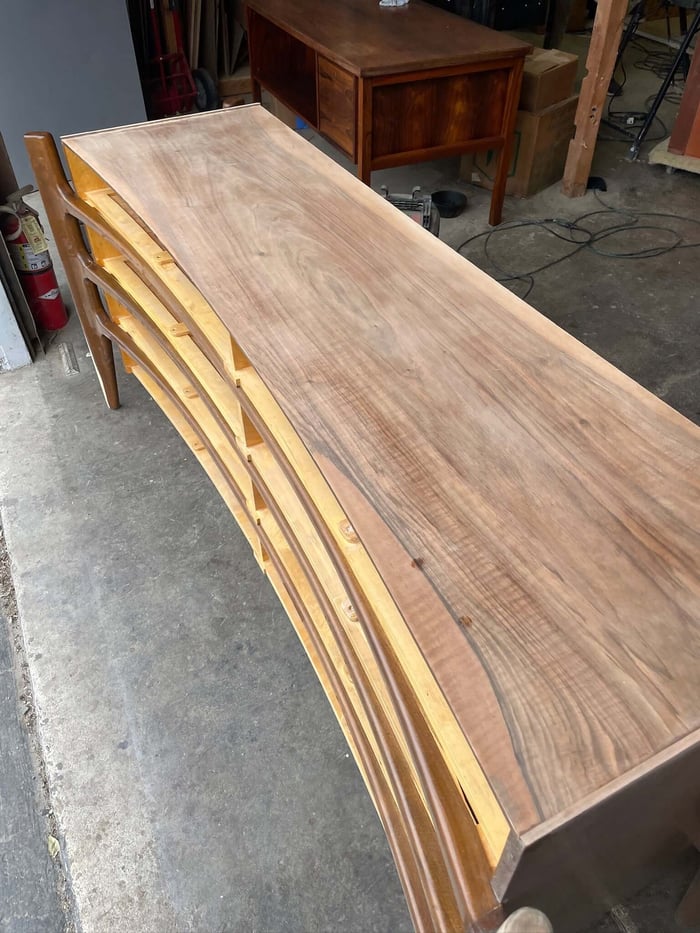 A freshly sanded William Hinn dresser on the Hobbs Modern workshop floor waiting for stain.
Restoring, as we define it at Hobbs Modern, is a lighter-touch alternative that works with the existing finish rather than removing it entirely. This process can leave some desirable patina leaving the wood refreshed with out looking to new.
Restoring a piece often means glazing to bring color depth back with stain, and then applying a fresh topcoat of pre-catalyzed lacquer over what's already there. It's the more conservative option as it's less invasive and faster, and is better suited to pieces where the underlying finish and wood are still structurally sound but lack depth, color, or sheen.
These terms often get confused because they sit on a spectrum rather than as fully separate processes. Choosing to strip a piece commits you to a full refinish; you can't leave bare wood exposed. Choosing to restore, by contrast, is a decision to preserve more of what's already there and original. Matching the right level of intervention to the piece in front of us— rather than defaulting to the most invasive option — is the core judgment call of this work and one we are very passionate about.
When Does a Piece Need Full Refinishing vs. Restoring?
Not every piece that looks tired or has a failing finish needs to be stripped all the way down to bare wood. Knowing whether a piece calls for a full refinish or can be brought back through restoring is one of the most consequential judgment calls in this work.
A few factors determine which path is appropriate:
- Depth of damage. Surface scratches, light cloudiness, minor water rings, and UV fading that sit within the topcoat can often be addressed through restoring. This would be glazing color back into the existing finish and adding a fresh topcoat, without removing everything beneath it. Damage that has penetrated into the wood itself (deep gouges, dark water stains, finish that has cracked and let moisture into the grain) generally requires a full refinish. Additionally, yellowed or flaky finishes require a full refinish to bring the pieces natural beauty back.
- Finish type and condition. Original lacquer finishes from the 1950s–60s can sometimes be revived through cleaning, light abrasion, and re-amalgamation rather than full removal — preserving more of the original surface through restoring. Finishes that have alligatored, gone gummy, flaky, or yellowed unevenly can only be fix typically with a full strip and refinish.
- Wood condition underneath. If the substrate is solid wood and in good condition, a full refinish is lower-risk. If the piece is veneered — which describes the vast majority of mid-century case goods — the decision changes entirely, because veneer thickness limits how much sanding and stripping the surface can tolerate before you're through to the substrate, making restoring the safer default when the existing finish allows for it. Veneer can be refinished. While many mid century pieces do have very thick veneer compared to modern standards and can often be restored several times, sanding veneers requires experience and expert hands and eye for detail.
- Authenticity and value considerations. For collector-grade pieces, the correct restoration of finish can matter to its value. A poor refinish can ruin the pieces value. The correct restoration can increase the pieces value in today's market place.
This is a diagnostic decision and not a default. We make it during the same hands-on evaluation Ryan Hobbs performs to authenticate a piece — assessing joinery, finish, veneer thickness, and wood condition together before deciding on a course of action.
The Full Furniture Stripping and Refinishing Process: Step by Step
When a piece needs a full refinish rather than restoring, the workflow follows a consistent sequence. Skipping or rushing any stage tends to show up later — in blotchy stain, finish that doesn't cure properly, or a surface that fails within a year. Here's the order, and why each step exists before we walk through the most technical stages in more detail below. (Restoring follows a shorter path — cleaning, glazing with stain to bring back color depth, and a fresh topcoat — without the stripping and sanding stages below.)
- Evaluation - assessing wood species, veneer vs. solid construction, finish type, and damage extent.
- Disassembly- where appropriate — removing hardware, drawers, and detachable elements to strip and finish surfaces evenly.
- Chemical stripping- removing the old finish down to bare wood.
- Neutralizing and cleaning- removing stripper residue so it doesn't interfere with new stain or finish. We use Lacquer thinner.
- Repairs -addressing structural issues, veneer lifting, or wood damage exposed during stripping, before any cosmetic work begins. Steaming dents and scratches.
- Sanding and surface preparation - progressive grit sanding to create a smooth, even substrate. We typically start with 220 grit and move to 320 grits and finish by hand with sanding sponge.
- Staining- adjusting wood tone to match the piece's original or intended color.
- Finish application-building up the final lacquer, oil, wax, or varnish system in controlled layers.
- Toning- We use colored lacquer to tone any wood that needs to have a deeper color.
- Curing and reassembly - allowing the finish to fully harden before hardware and components go back on. The piece is then completely reassembled.
Chemical Stripping: Removing the old finish safely
Chemical strippers work by softening and breaking down a cured finish so it can be lifted off the wood with a scraper or abrasive steel wool, rather than sanded off mechanically. This matters enormously on veneered furniture, where mechanical sanding alone risks cutting through a veneer layer.
Stripping products generally fall into a few categories: solvent-based strippers (effective and fast-acting, but requiring careful ventilation and handling), and slower, lower-odor formulations that work more gently and are often preferred for delicate veneers, inlay, or marquetry where aggressive solvents could lift glue lines. The choice of product depends on the finish being removed, the wood and veneer involved, and how much working time the restorer needs to control the process by hand.
Safety considerations run in two directions: protecting the person doing the work, and protecting the piece. Proper ventilation, gloves, and eye protection are non-negotiable for the restorer. For the furniture, the real risk is over-application or over-dwelling — leaving stripper on too long, scrubbing too aggressively, or using a stripper too harsh for the substrate can soften and lift veneer, raise grain unevenly, or leach into joints and glue lines in ways that cause problems weeks later. This is precision hand-work, applied in small sections and monitored continuously.
Sanding and Surface Preparation
Once a finish is chemically stripped, the wood underneath still needs to be brought to a clean, even, receptive surface before stain or finish can be applied — and this stage is where veneer damage most often happens in inexperienced hands.
Sanding typically progresses through a sequence of grits, moving from coarser to finer (for example, starting around 120–150 grit to remove residual stripper haze and minor unevenness, then progressing to 180, 220, and sometimes 320 for a final smoothing pass before finish). Each grit removes the scratch pattern left by the one before it; skipping grits leaves visible scratches that show through stain and finish.

Sanding direction matters as much as grit. Sanding must follow the wood grain — cross-grain scratches are far more visible once stain is applied and can be effectively impossible to remove without sanding deeper than the veneer allows. On curved, sculpted, or sharply tapered mid-century forms — think of Wegner chair's compound curves or the sculpted arms common in Scandinavian design — sanding by hand, with the grain following the form rather than a flat plane, is the only way to avoid flat spots that disrupt the piece's original silhouette.
This is also the stage where veneer thickness becomes a hard constraint rather than an abstraction. On solid wood, a restorer has real margin for error. On veneer — which makes up the surfaces of most mid-century case goods, from Paul McCobb credenzas to Milo Baughman cabinets — there may be only a few sanding passes' worth of material before you're through to the substrate below, and there is no recovering from that.
Staining or Bleaching: Adjusting Wood Tone
Wood tone shifts over decades of light exposure, oxidation, and prior refinishing — and stripping itself can reveal blotchy or uneven color that the original finish was masking. Stain and bleach are the tools used to bring tone back into a consistent, intentional range.
Stain adds color, used either to deepen and even out the wood's natural tone or to shift it toward a target color — matching, for example, the rich walnut or rosewood tones characteristic of a given designer or era. Bleach does the opposite: it lifts color, used to correct dark water stains, even out heavy discoloration, or lighten a piece toward a more neutral tone before staining.
For vintage and mid-century pieces specifically, color matching is not a stylistic preference — it's an authenticity issue. A Brazilian rosewood Eames lounge chair has a specific tonal signature tied to that wood and that era of production. An Arne Vodder credenza in teak has its own characteristic color range. Pushing a tone too far in either direction, or using a stain formulated for a different species, can leave a piece looking technically "refinished" but visibly disconnected from its design history — a mismatch collectors and design-literate buyers notice immediately. Matching original tone as closely as the wood allows is a core part of doing this work correctly, not an optional finishing touch.
Applying the Final Finish: Lacquer, Oil, Wax, or Varnish
The final finish is what actually protects the wood going forward — and the choice of finish type has a major effect on how a piece looks, feels, and ages.
- Lacquer was the dominant factory finish on most mid-century case goods and many chairs. It produces a clear, relatively hard, often slightly glossy surface and dries fast enough to allow multiple coats in a controlled shop environment. For period-correct restoration of factory-finished MCM pieces, lacquer is frequently the most historically appropriate choice.
- Oil finishes (such as Danish oil) penetrate the wood rather than sitting on top of it, producing a low-sheen, tactile surface that many Scandinavian Modern pieces were designed around. Oil finishes are lower-build and require more maintenance over time, but they preserve a hand-finished look appropriate to certain designers and forms.
- Wax is often used as a final layer over an oil or lacquer base, adding sheen and a smooth hand-feel, or on its own for pieces meant to read as minimally finished. Wax offers the least protection of the group and is generally not a standalone solution for furniture in regular use.
- Varnish/polyurethane finishes are harder and more chemical-resistant than lacquer but build a thicker, often less period-accurate film. They're more common in general furniture repair than in specialist MCM restoration, where they can read as visually heavier than the original factory finish.
Choosing among these isn't just about durability — it's about matching the finish to what the piece was designed to look and feel like when it left the factory or the original craftsperson's hands. This is a decision that should be made with the piece's design history in mind.
Why Mid-Century Modern Pieces Require a Specialist's Touch
Everything above applies to furniture refinishing broadly. Mid-century modern furniture adds a set of constraints that make general competence insufficient.
Most MCM case goods are veneered, often thinly, over substrates that can be plywood, particleboard, or solid secondary wood — a construction method chosen for the era's clean, minimal lines, not for forgiving repeated sanding. Many pieces use exotic and increasingly scarce woods: Brazilian rosewood, used on Eames lounge chairs until trade restrictions ended its use around 1979 and now CITES-protected; the figured walnut and exotic burls favored by designers like Nakashima and Milo Baughman; teak and rosewood imported from Scandinavia and used by Wegner, Vodder, and their contemporaries. None of this material can simply be replaced or "matched" from a hardware store shelf.
The forms themselves add difficulty. Sculpted, compound-curved silhouettes — Wegner's organic chair backs, Kagan's biomorphic case pieces, the tapered and angled legs that define the era — require sanding and finishing technique that follows the form by hand, not a flat-plane approach that works on a traditional rectilinear dresser. And because these pieces are recognized, researched, and actively collected, errors are visible to buyers in a way they wouldn't be on an unbranded piece: a slightly wrong tone, a flattened curve, or a too-glossy finish on a piece that should read matte will be noticed by exactly the audience willing to pay a premium for authenticity.
The Risk of Using a Generalist Furniture Repair Technician Near You
A general furniture repair shop can do excellent work on a contemporary dresser or a solid-wood farmhouse table. Those same skills, applied without MCM-specific knowledge, are where most irreversible damage to vintage pieces happens.
The most common and costly mistakes include:
- Sanding through veneer. A power sander run the way it would be on solid wood can cut through a thin veneer layer in seconds, exposing substrate underneath with no way to undo it short of a full veneer replacement — a far more invasive (and expensive) repair than the original problem.
- Using the wrong finish system. Applying a modern polyurethane to a piece designed around a thin lacquer or oil finish changes its visual character and can make later, more careful restoration work more difficult.
- Mismatched stain and tone. Generic "walnut" or "mahogany" stains formulated for common hardwoods don't replicate the specific tonal qualities of rosewood, teak, or the figured woods MCM designers favored, leaving a piece that reads as "redone" rather than restored.
- Flattening sculpted forms. Mechanical sanding on curved or tapered elements, done without attention to the original silhouette, can subtly but permanently alter a piece's proportions and profile.
- Treating CITES-restricted woods like ordinary materials. Pieces in Brazilian rosewood and other protected species carry documentation and handling considerations a generalist shop may not even be aware of, which becomes critical if the piece is ever resold or exported.
None of these mistakes are usually visible until the work is already done — which is exactly why vetting matters before, not after, you hand a piece over.
Preserving Patina, Veneer, and Original Character
Restoration done well isn't about making a piece look brand new — it's about stabilizing and protecting it while preserving the qualities that make it what it is. Patina, the soft visual and tactile aging of original wood and finish, is part of a piece's history and, for many collectors, part of its appeal. A specialist evaluates, on a piece-by-piece basis, how much of that character should be preserved versus addressed, rather than defaulting to stripping everything back to a uniform "new" look.
That same judgment extends to veneer. Because veneer thickness is a hard physical limit rather than a stylistic choice, protecting it means choosing the gentlest stripping method that will actually work when a full refinish is necessary, sanding minimally and by hand in vulnerable areas, and recognizing when restoring is the more conservative — and more correct — choice over a full strip and refinish. Original hardware, joinery, and maker's marks are treated in our workshop as part of the piece's documentation.
The goal, in short, is restoration that respects the piece's age rather than concealing it.
Expert Furniture Stripping, Refinishing, and Restoration at Hobbs Modern
Hobbs Modern's restoration work happens in-house, in our San Diego workshop, under the hands-on direction of Ryan Hobbs — the same workshop-first evaluation he applies to authenticating every piece we sell extends directly to how we stabilize and restore them. Decisions are made piece by piece, based on wood species, veneer thickness, construction, and the piece's design history and not a one-size-fits-all process.
As a dealership built around one of the largest collections of rosewood Eames lounge chairs in the country and one of the largest George & Mira Nakashima collections on the West Coast, we work with the materials and forms every day.
If you're evaluating a vintage or mid-century piece for restoration — or trying to understand what condition issues mean for a piece you're considering buying — we're happy to walk through it with you. Contact our workshop or browse our current collection to see restoration work in context.
FAQs
What is the difference between furniture stripping, refinishing, and restoring?
Stripping is the removal of an existing finish down to bare wood. Refinishing is the complete process that follows a full strip — sanding bare wood evenly, staining to enhance color, and applying a new topcoat. Restoring is a lighter-touch alternative that works with the existing finish rather than removing it, typically glazing color back into the surface with stain and applying a fresh topcoat of lacquer over what's already there. Refinishing is used when the original finish is too degraded to work with; restoring is the more conservative option when the existing finish and wood are still sound.
Does my furniture need a full refinish, or can it be restored?
It depends on the depth of damage, the condition of the existing finish, and the wood underneath. Surface scratches, light cloudiness, and minor fading can often be addressed by restoring — glazing color back in and adding a fresh topcoat without removing the existing finish. Deep gouges, dark water stains, or finish that has failed beyond cleaning usually require a full strip and refinish. For veneered furniture, veneer thickness is also a major factor in this decision.
Can veneer furniture be refinished?
Yes. Veneer can absolutely be refinished, but veneer thickness limits how much sanding and stripping it can tolerate before the substrate underneath is exposed. Many mid-century pieces used noticeably thicker veneers than modern furniture does, which means they can often be restored or refinished more than once over their lifespan — as long as the work is done carefully by someone experienced in sanding veneer.
Why does mid-century modern furniture need a specialist for refinishing?
Mid-century modern furniture is frequently built with thin veneers over substrates that can't tolerate aggressive sanding, uses exotic and increasingly scarce woods like Brazilian rosewood and teak, and often features sculpted, compound-curved forms that require hand-finishing technique. A generalist repair technician without MCM-specific experience risks sanding through veneer, using period-inappropriate finishes, or altering the piece's original silhouette.
What finish is most appropriate for restoring vintage mid-century furniture?
It depends on the piece. Lacquer was the dominant factory finish on most mid-century case goods and is often the most period-correct choice. Oil finishes suit many Scandinavian Modern pieces designed around a low-sheen, hand-finished look. Wax is typically used as a final layer rather than standalone protection, and varnish or polyurethane is more common in general furniture repair than in specialist MCM restoration.
Can dents and scratches be repaired without sanding through the wood
Often, yes. Shallow dents that haven't broken the wood fibers can frequently be raised using steam — applying gentle heat and moisture so the compressed wood grain swells back to its original level. It's a slower repair than sanding the area flat, but it preserves more original material, which matters most on veneered pieces where sanding margin is limited. Deep dents may need to be filled and then touched up after staining.
What products are used for DIY furniture stripping?
For smaller home projects, widely available stripping products like Kleen Strip Paint Remover & Stripper or Jasco Premium Paint Remover work well for general use and can be found at most hardware stores. Once the old finish has lifted, the surface should be wiped down with lacquer thinner or acetone to remove stripper residue before sanding or refinishing. Proper ventilation and protective gloves are essential throughout.
What questions should I ask before hiring a furniture refinishing service for a vintage piece
Ask about their specific experience with mid-century modern and designer furniture, whether they'll evaluate the piece in person before recommending a process, how they handle veneer and avoid sand-through, what finish they recommend and why, how they'll match wood tone, and whether they can show examples of comparable restored pieces.